

Settings → Tagging in your OpenCX dashboard. Managing tags, categories, and the automation switches requires the Tags permission under Settings in Settings → Roles. Adding or removing tags on a session requires permission to update sessions.
How categories guide auto-tagging
Tags live in categories. A tag without a category appears under Uncategorized.
Write descriptions in your customers’ words: what they ask about, not your internal team names. Tag and category names cannot contain double quotes, backslashes, or line breaks.
Create categories and tags
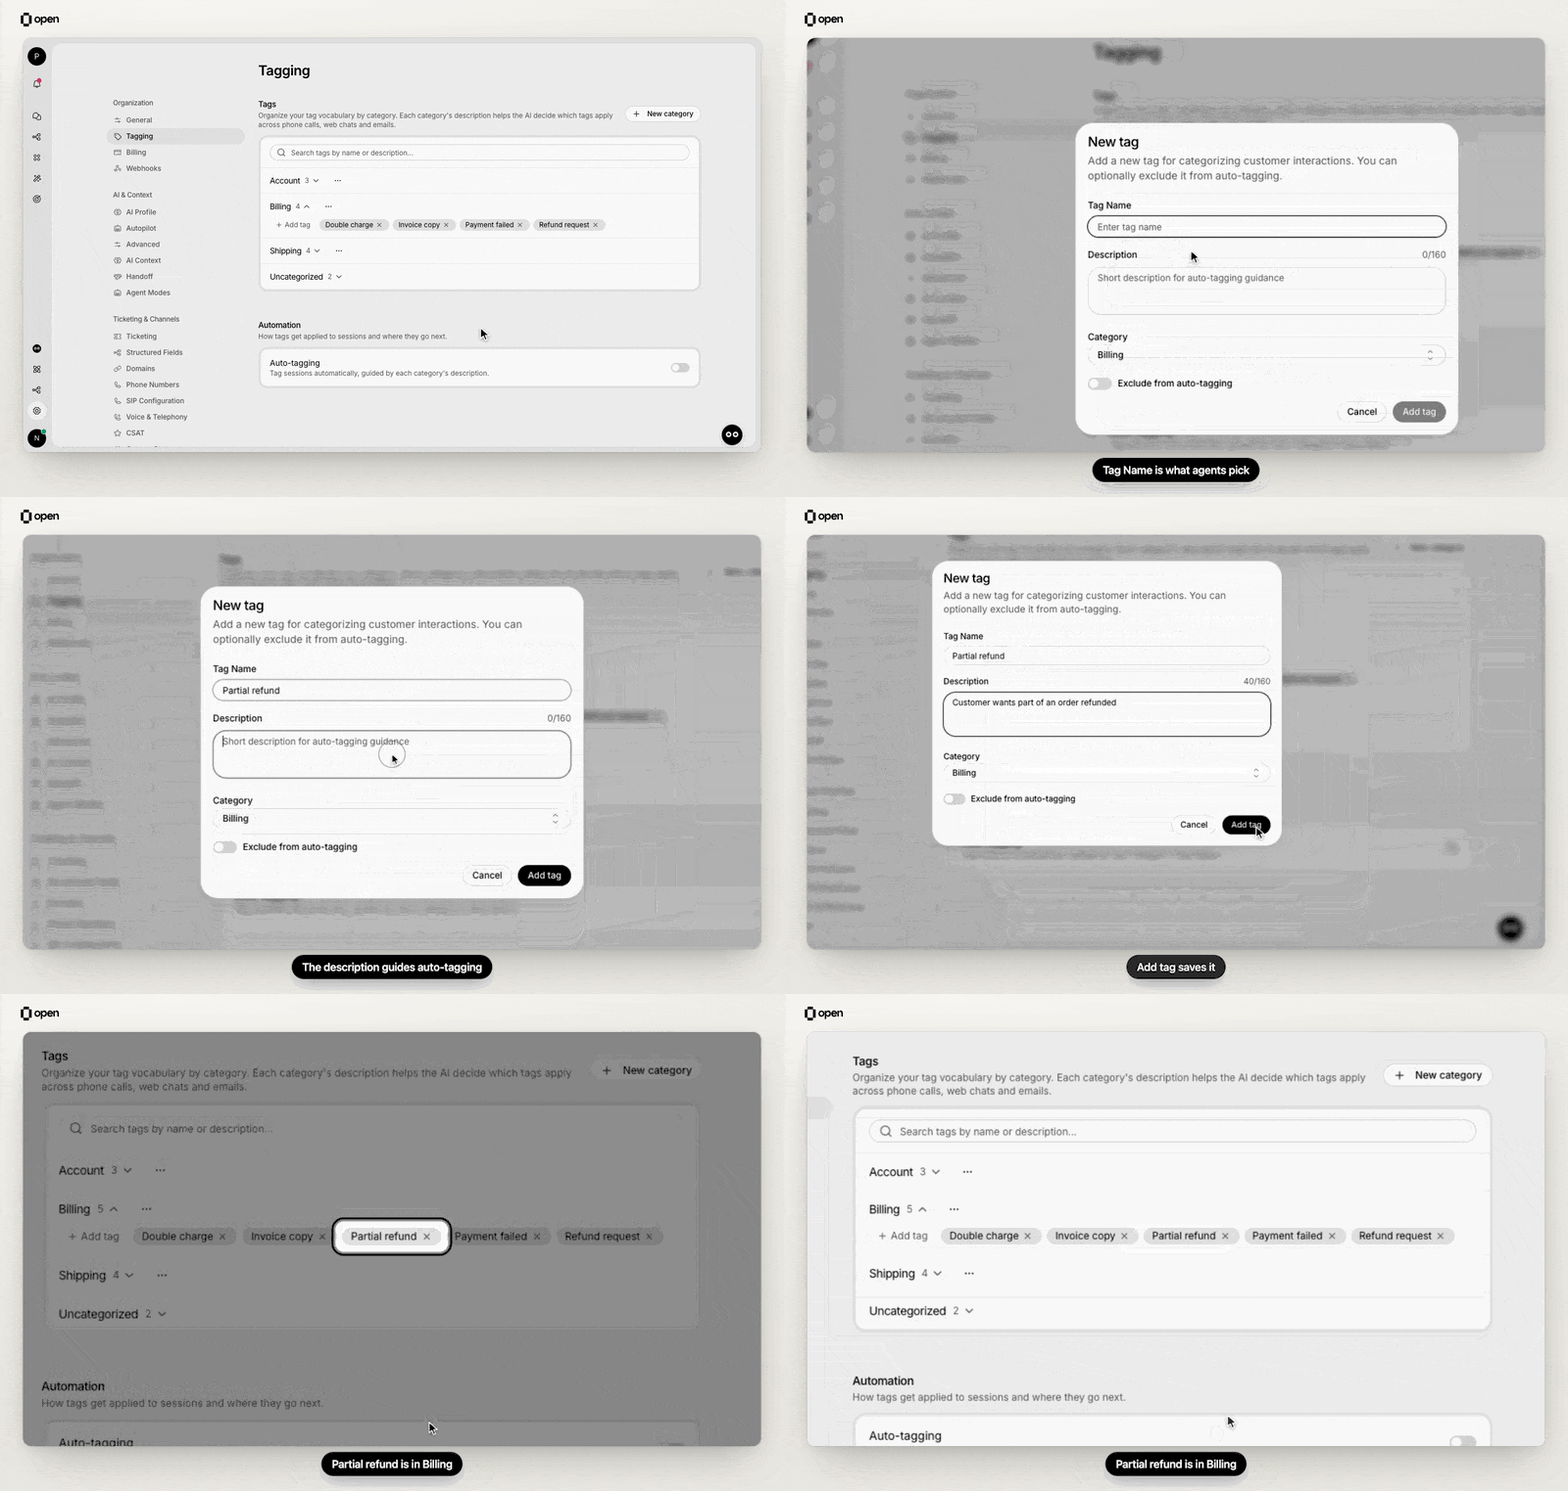
Add a tag with a description inside the Billing category, and it appears among Billing's tags.
1
Create a category
On Settings → Tagging, click New category. Enter a Name, for example Billing, and a Description of what the category covers, then click Create category.
2
Add tags to it
Open the category’s menu and choose Add tag, or click Add tag inside the category. Enter a Tag Name and an optional Description, then click Add tag.
3
Keep manual-only tags out of auto-tagging
Turn on Exclude from auto-tagging for a tag that only an agent or a workflow should apply.
Turn on auto-tagging
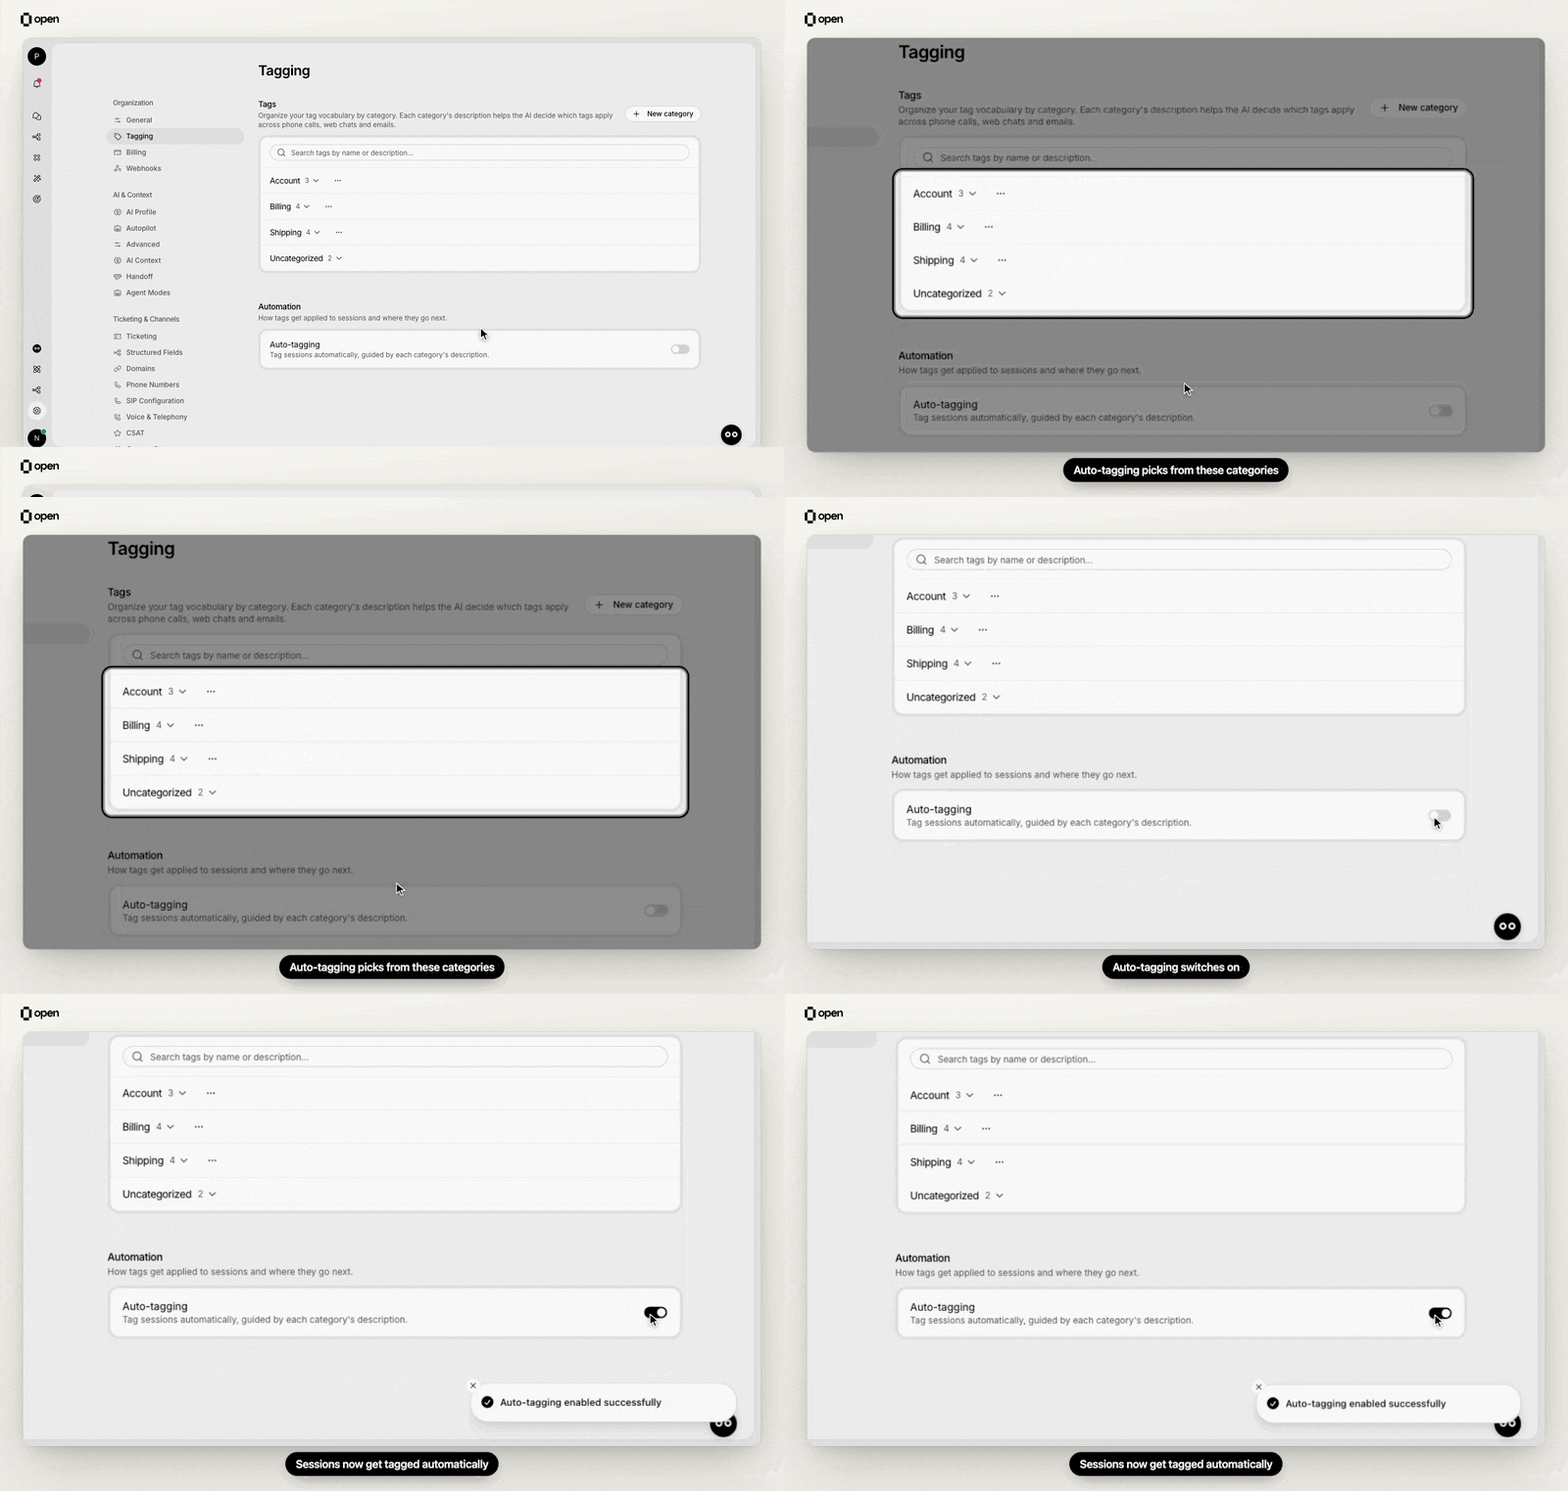
Switch on Auto-tagging under Automation and OpenCX confirms it is enabled.
- The AI resolves it, or the customer confirms it is resolved.
- The customer ends it from the widget.
- OpenCX resolves it automatically after inactivity.
- A workflow closes it with the Close Ticket action and Resolved on.
- The linked conversation is closed in Intercom.
- A phone call on the session ends.
Resolving a session from the inbox status menu does not run auto-tagging. To tag those sessions too, add the Auto Tag Ticket action to a workflow. It applies the most relevant tag, or the Fallback Tag you choose when none fits.
Sync tags to your helpdesk
When your ticketing system is Zendesk, Intercom, or Infobip, Automation also shows Sync tags to [system]. Turn it on to send tags to the linked ticket or conversation when they are added to a session. It is off by default. In Zendesk, OpenCX adds its tags and leaves the ticket’s other tags in place.Add or remove tags on a session
1
Open the session
In the inbox, open the session and find the Session Tags card in the sidebar.
2
Add a tag
Click +, search, and pick a tag. Tags already on the session are hidden from the list. Only tags defined under Settings → Tagging can be added; Manage tags opens that page.
3
Remove a tag
Click the x on the tag.
Find and report on tagged sessions
- Add the Tag filter in the inbox and save it as a view.
- In Filters → Group by, choose Tags. A session appears under each of its tags; sessions without tags appear under Untagged.
- Include the Session Tags column in Reports → Data Export.
Rename or delete tags and categories
- Rename a tag: editing the name replaces the old tag with a new one. Sessions already tagged keep the old name.
- Delete a tag: sessions already tagged keep it, but it can no longer be applied. This cannot be undone.
- Delete a category: its tags move to Uncategorized.
Troubleshooting
Related Documentation
Inbox
Filter and group sessions by tag.
Custom Statuses
Track where a session stands.
Zendesk Ticketing
Tags OpenCX writes to Zendesk tickets.
Tags API
Manage tags and auto-tagging programmatically.