

Contacts → Segments in your OpenCX dashboard. The page has no sidebar entry: press ⌘K (Ctrl+K on Windows) and choose Contacts > Segments, or pick Manage segments in the view menu on the Contacts page. See keyboard shortcuts. Viewing segments requires the Contacts permission with Read; creating, editing and deleting them requires Write.
Create a segment
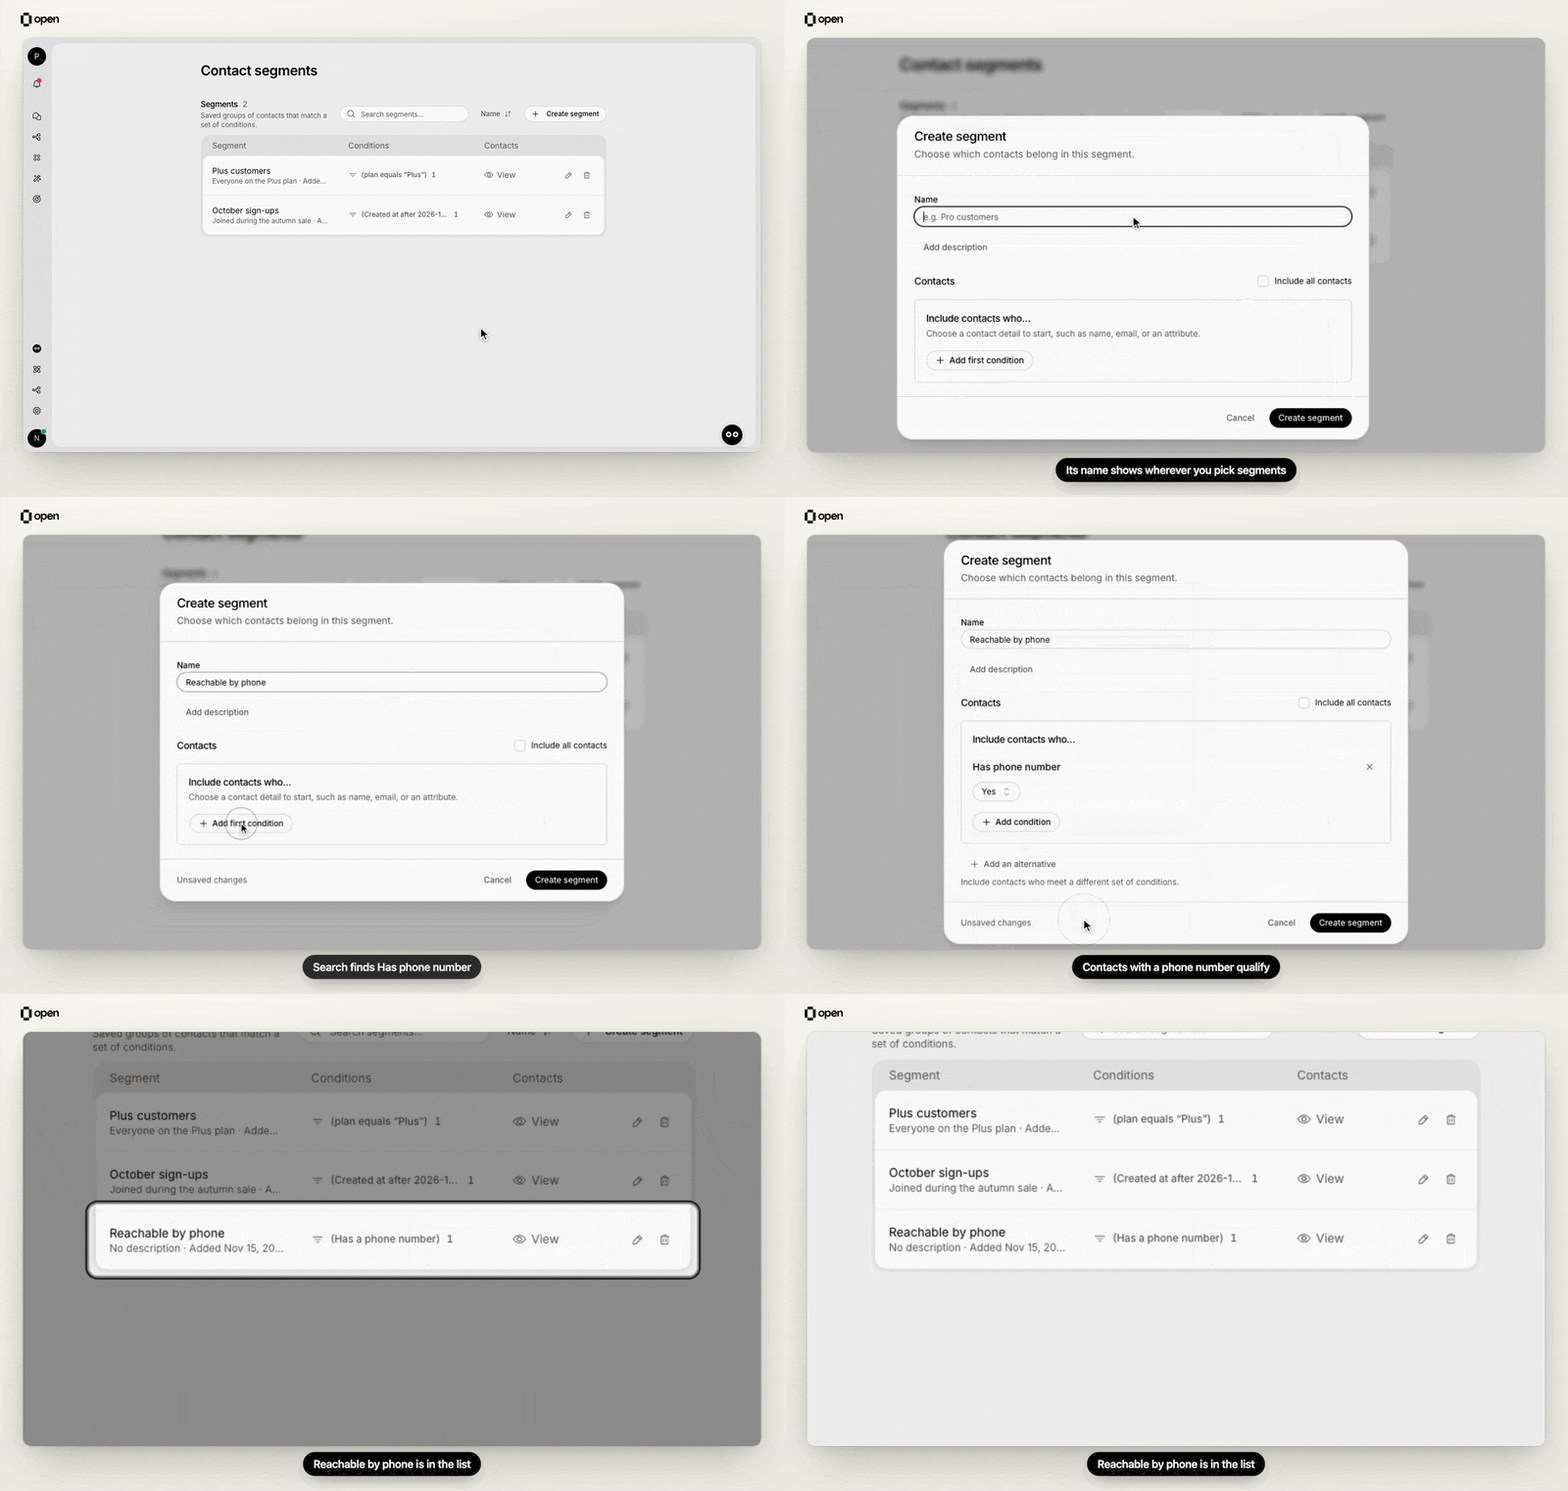
Create a segment named Reachable by phone with one condition, Has phone number, and see it in the list.
1
Start a segment
On Contact segments, select Create segment, enter a Name, and optionally Add description.
2
Add conditions
Select Add first condition and search for a condition. Use Add condition to add more; a contact must meet every condition in the section, shown as Include contacts who….
3
Add alternatives (optional)
Add an alternative creates another way to qualify, shown as Or include contacts who…. A contact only needs to qualify for one alternative. For example, one alternative includes Pro customers in France and another includes VIP customers anywhere.
4
Save
Select Create segment. To put every contact in the segment instead, tick Include all contacts.
Conditions you can use
For list conditions, use the add button for each extra value. An empty list matches no contacts. Date conditions need at least one bound, and the end must be after the start.
How membership stays up to date
OpenCX saves who belongs to each segment and keeps it current in the background:- When you create a segment or change its conditions, membership is worked out for every contact. Renaming a segment or changing its description doesn’t trigger this. Right after saving, the contact list can still show the previous membership for a short time.
- When a contact is created or changed, by an agent, the API, the widget or a CSV import, OpenCX checks that contact against every segment.
- Membership isn’t re-checked on a timer. A contact’s membership changes only at the moments above.
Where segments are used
Sessions with no known contact
Sessions with no known contact
When a session has no contact, segment-restricted instructions, documents and actions don’t apply, unless one of the segment’s alternatives uses only Session attributes conditions and the current session matches them.
Adding a contact from a workflow
Adding a contact from a workflow
Add Contact to Segment adds the contact directly. Segments are defined by their conditions, so the next membership check removes the contact again if it doesn’t match them.
View, edit or delete a segment
The Segments list shows each segment’s name, description and the date it was added. Select the Conditions summary to see every condition and alternative. Use the search box to find a segment by name.- Edit: use the row action to open the segment and select Save changes. Without Write, the same action opens a read-only Segment details view.
- Delete: select the trash icon and confirm. Contacts are kept; only the segment and its membership are removed. Instructions, documents, actions and workflows that name the segment are not updated, so review them first.
Troubleshooting
Related Documentation
Segments API
Create segments and check membership.
Training scenarios
Target instructions by segment.
Build an action
Restrict actions to segments.
Manage contacts
Filter the contact list by segment.