

Settings → Skills in your OpenCX dashboard. Viewing skills requires the Skills settings permission; creating, editing, deleting and assigning skills requires write access to it.
What skill routing needs
Skills on their own do not change who gets a session. Routing by skill needs all three of these:- Agents hold skills. You give them skills on the Members page.
- The session carries skills. The Assign Skills to Ticket workflow action adds them. Sessions get skills no other way.
- The workflow assigns the session with skill routing on. Assign Ticket to Support Team or Auto Assign to Support Team with Skill-based routing turned on. It is off by default.
Create a skill
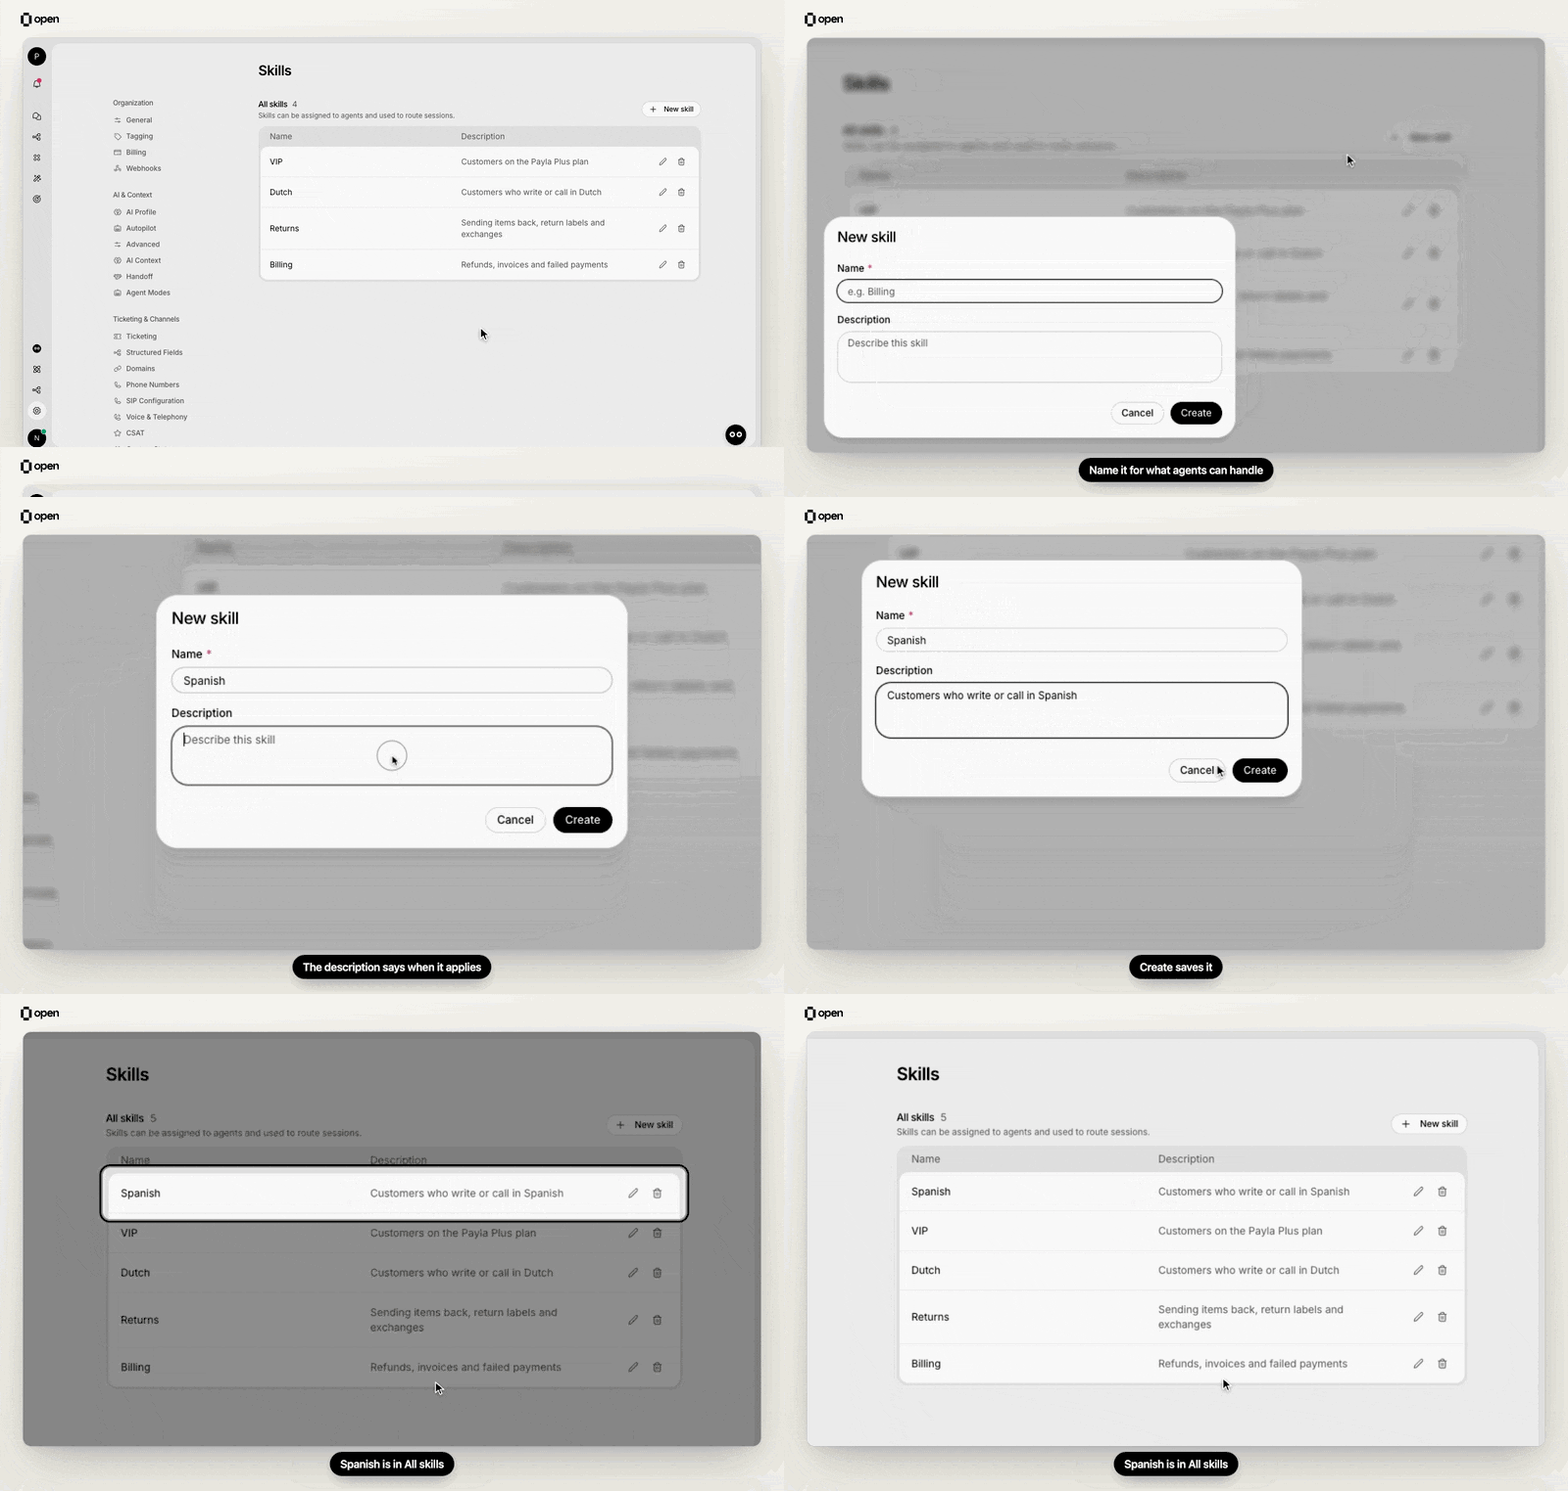
Create a skill called Spanish with a description, and it appears at the top of All skills.
1
Open the form
Click New skill.
2
Name it
Enter a Name of up to 64 characters, such as Billing. Names are unique in your workspace, ignoring capitalization.
3
Describe when it applies
Add a Description, then click Create. Workflows can read every skill’s name and description through the
{{routingSkills}} variable, so an AI step can decide which skills a session needs. Write the description as the situation the skill covers, for example “Refunds, invoices and failed payments”.Give skills to agents
- Open Settings → Members.
- Open the member’s three-dot menu and choose Assign skills.
- Select every skill the member has, then click Save. The list you save replaces the member’s previous skills.
Add skills to a session
In a workflow, add the Assign Skills to Ticket action. Pick skills from the list, or pass skill names from an earlier step, such as an AI step that reads{{routingSkills}}.
- Skills are added. Skills already on the session stay.
- Names that match no skill are skipped and returned as Unresolved Skills.
- The session timeline shows which skills were added, and the Session skills card in the Inbox sidebar lists them. You cannot edit a session’s skills from the Inbox.
Assign to an agent with the right skills
After Assign Skills to Ticket, add Assign Ticket to Support Team or Auto Assign to Support Team and turn on Skill-based routing.
An eligible member is online, available in that team, and has free capacity, and the team is within its office hours. See Human routing. When nobody qualifies, the assignment note in the session timeline explains it, for example “no available team member had all the required skills”.
Other places skills are used
- Team in the loop: when the AI asks your team for help, it mentions members who have the skills it needs. See Handoff settings.
- API: manage skills and each user’s skills with the Skills API.
Troubleshooting
Related Documentation
Human routing
Availability and capacity per agent
Teams
Support teams and assignment strategy
Members
Invite teammates and assign skills
Skills API
Manage skills programmatically