

Reports & Apps → Data Export in your OpenCX dashboard. Requires Reports: Read in Roles, plus access to view sessions (Inbox, Team sessions or Assigned sessions: Read) to export them. It isn’t in the sidebar until someone adds it; see Reports & Apps.
Export sessions
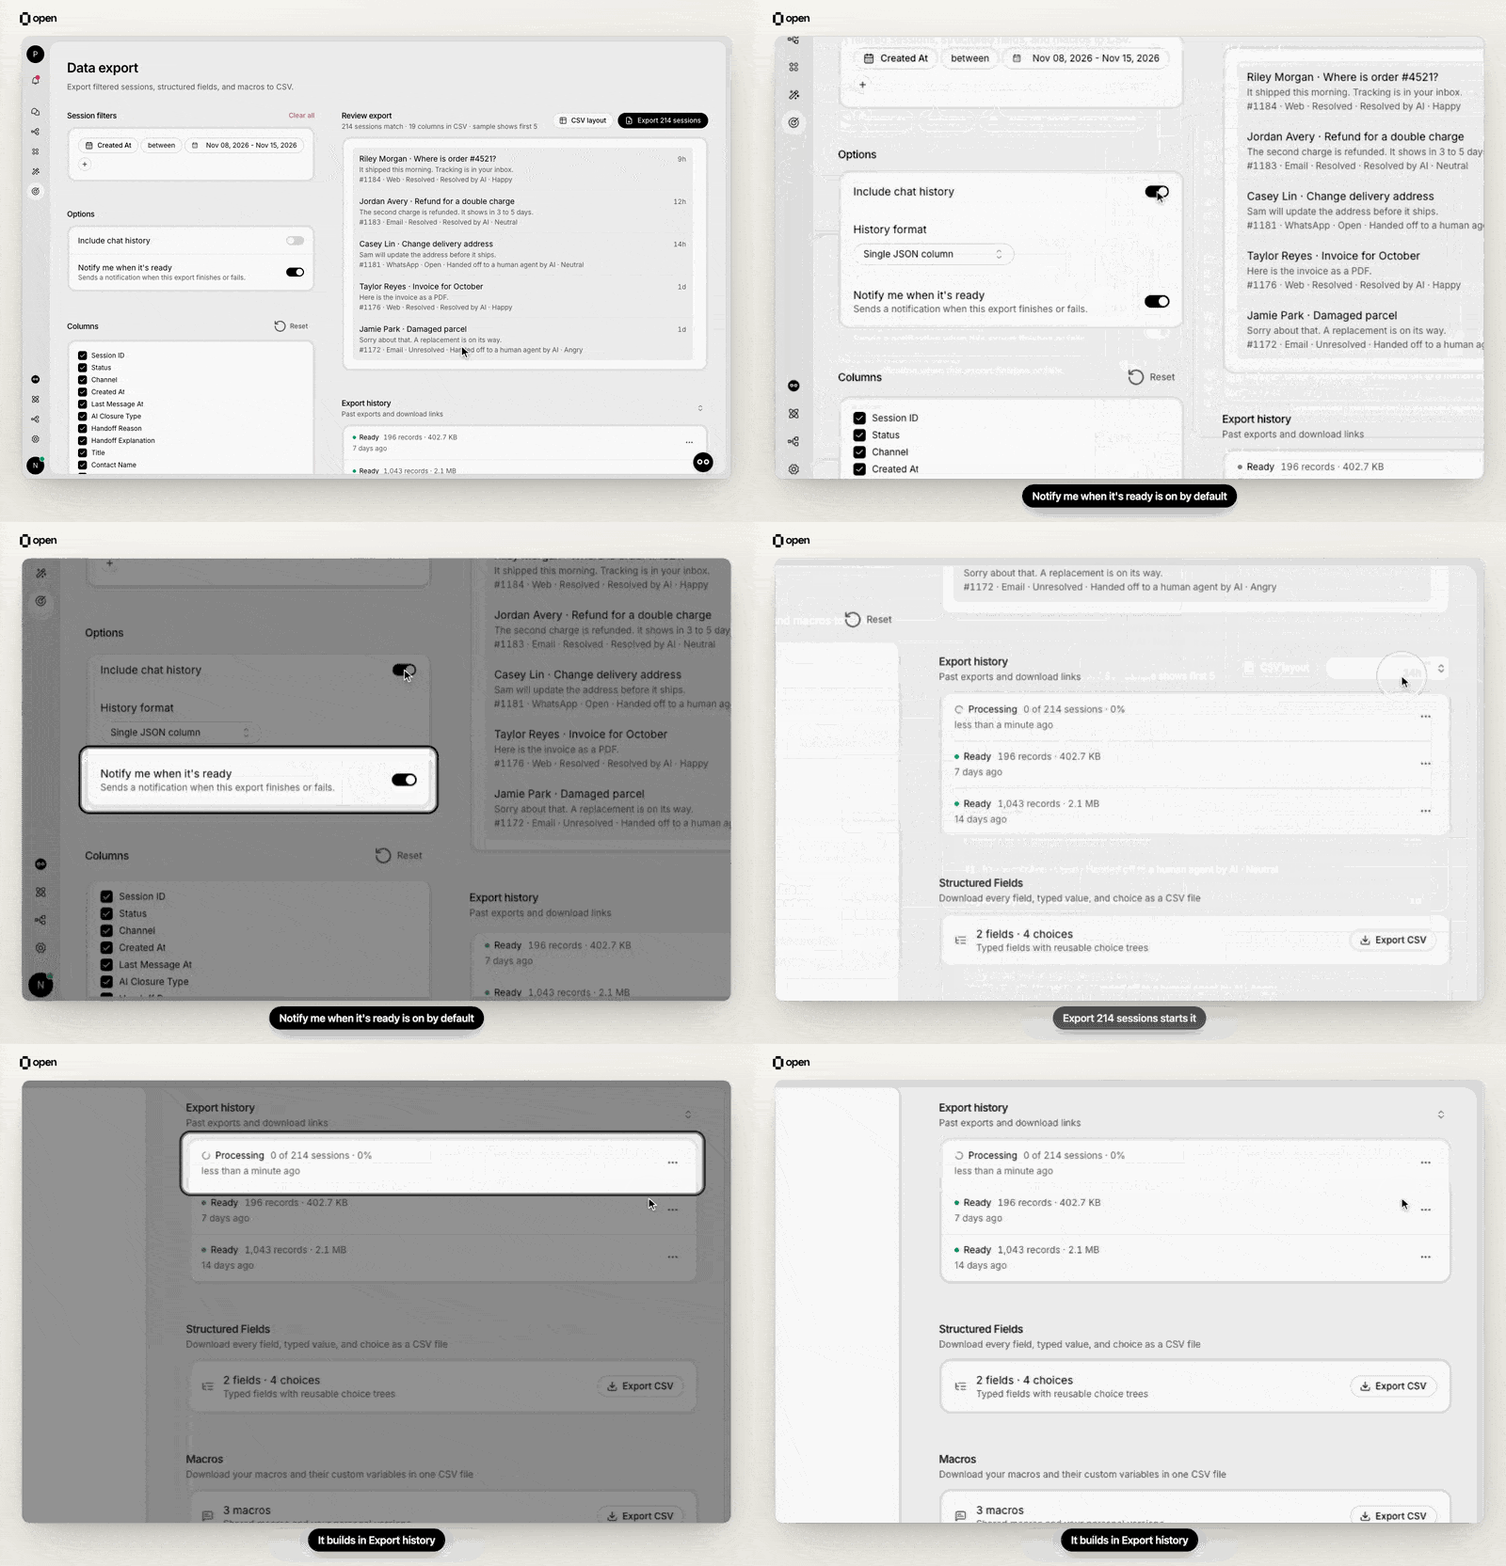
Turn on Include chat history, keep Notify me when it's ready on, and start the export: it builds in Export history.
1
Filter the sessions
Session filters uses the same filters as the inbox. A date range is always applied: the last 7 days by default. You can change it but not remove it, and day-based dates use your browser’s time zone. Clear all returns to the default.
2
Set the options
Under Options, turn on Include chat history to add the transcript, then pick a History format. Notify me when it’s ready is on by default.
3
Choose the columns
Tick the columns you want under Columns. Select a column’s name to rename its CSV header; the original name stays beside it. Reset restores the default columns and headers and removes custom data columns. At least one column always stays selected.
4
Review the export
Review export shows how many sessions match, how many columns the file will have, and a sample of matching sessions. CSV layout previews the headers and cell formatting of the file.
5
Start the export
Select Export … sessions. The file is built in the background and appears in Export history. You can leave the page.
Choose columns
These columns are selected by default: Session ID, Status, Channel, Created At, Last Message At, AI Closure Type, Handoff Reason, Handoff Explanation, Title, Contact Name, Phone Number, Contact Email, Classification, Sentiment, Language, External Session ID, Session Tags, CSAT Score and CSAT Comment.
These columns are off by default. Tick them to add them:
Add custom data columns
Under Custom data columns, select Add, choose Session custom data or Contact custom data, pick a Data key, and set the CSV header. The header fills in with the key name until you change it. A row without both a key and a header is left out of the file.Include the chat history
Track and download exports
Export history lists your organization’s exports, newest first. Members limited to team or assigned sessions see only the exports they started.
Open a row’s ⋯ menu to Download CSV or Delete it. Deleting permanently removes the file. Export files are kept until someone deletes them; see Data retention.
With Notify me when it’s ready on, you get a dashboard notification when your export finishes or fails. Opening it takes you to that export in Export history.
Export macros and Structured Fields
Both download immediately in your browser, ignore the session filters, and don’t appear in Export history.- Macros
- Structured Fields
In the Macros section, select Export CSV, then Download CSV. Requires Settings: Read or Macros settings: Read.The file has one row per macro: shared macros, and your personal versions in place of the shared originals they replace. Other people’s personal macros are not included. Attachments are listed as links; the files themselves are not included.Columns:
id, title, category, content_html, visibility (shared or personal), owner_user_id, overrides_macro_id, custom_variables (the custom variables the macro uses, including variables used inside them, with their content), options, attachments, exclude_from_suggestions, created_at, updated_at.Troubleshooting
Related Documentation
Impact Dashboard
What AI Closure Type means
Inbox
The same session filters
Data retention
How long exports are kept
Phone answer-time SLA
Phone columns explained