

Settings → Personalization in your OpenCX dashboard is open to every member. Settings → My Profile requires read access to Personal profile in Roles. Saving your profile or alias requires write access to Personal profile or Members.
Change how the dashboard looks
Appearance is saved in this browser only. On another browser or computer, you start from the defaults.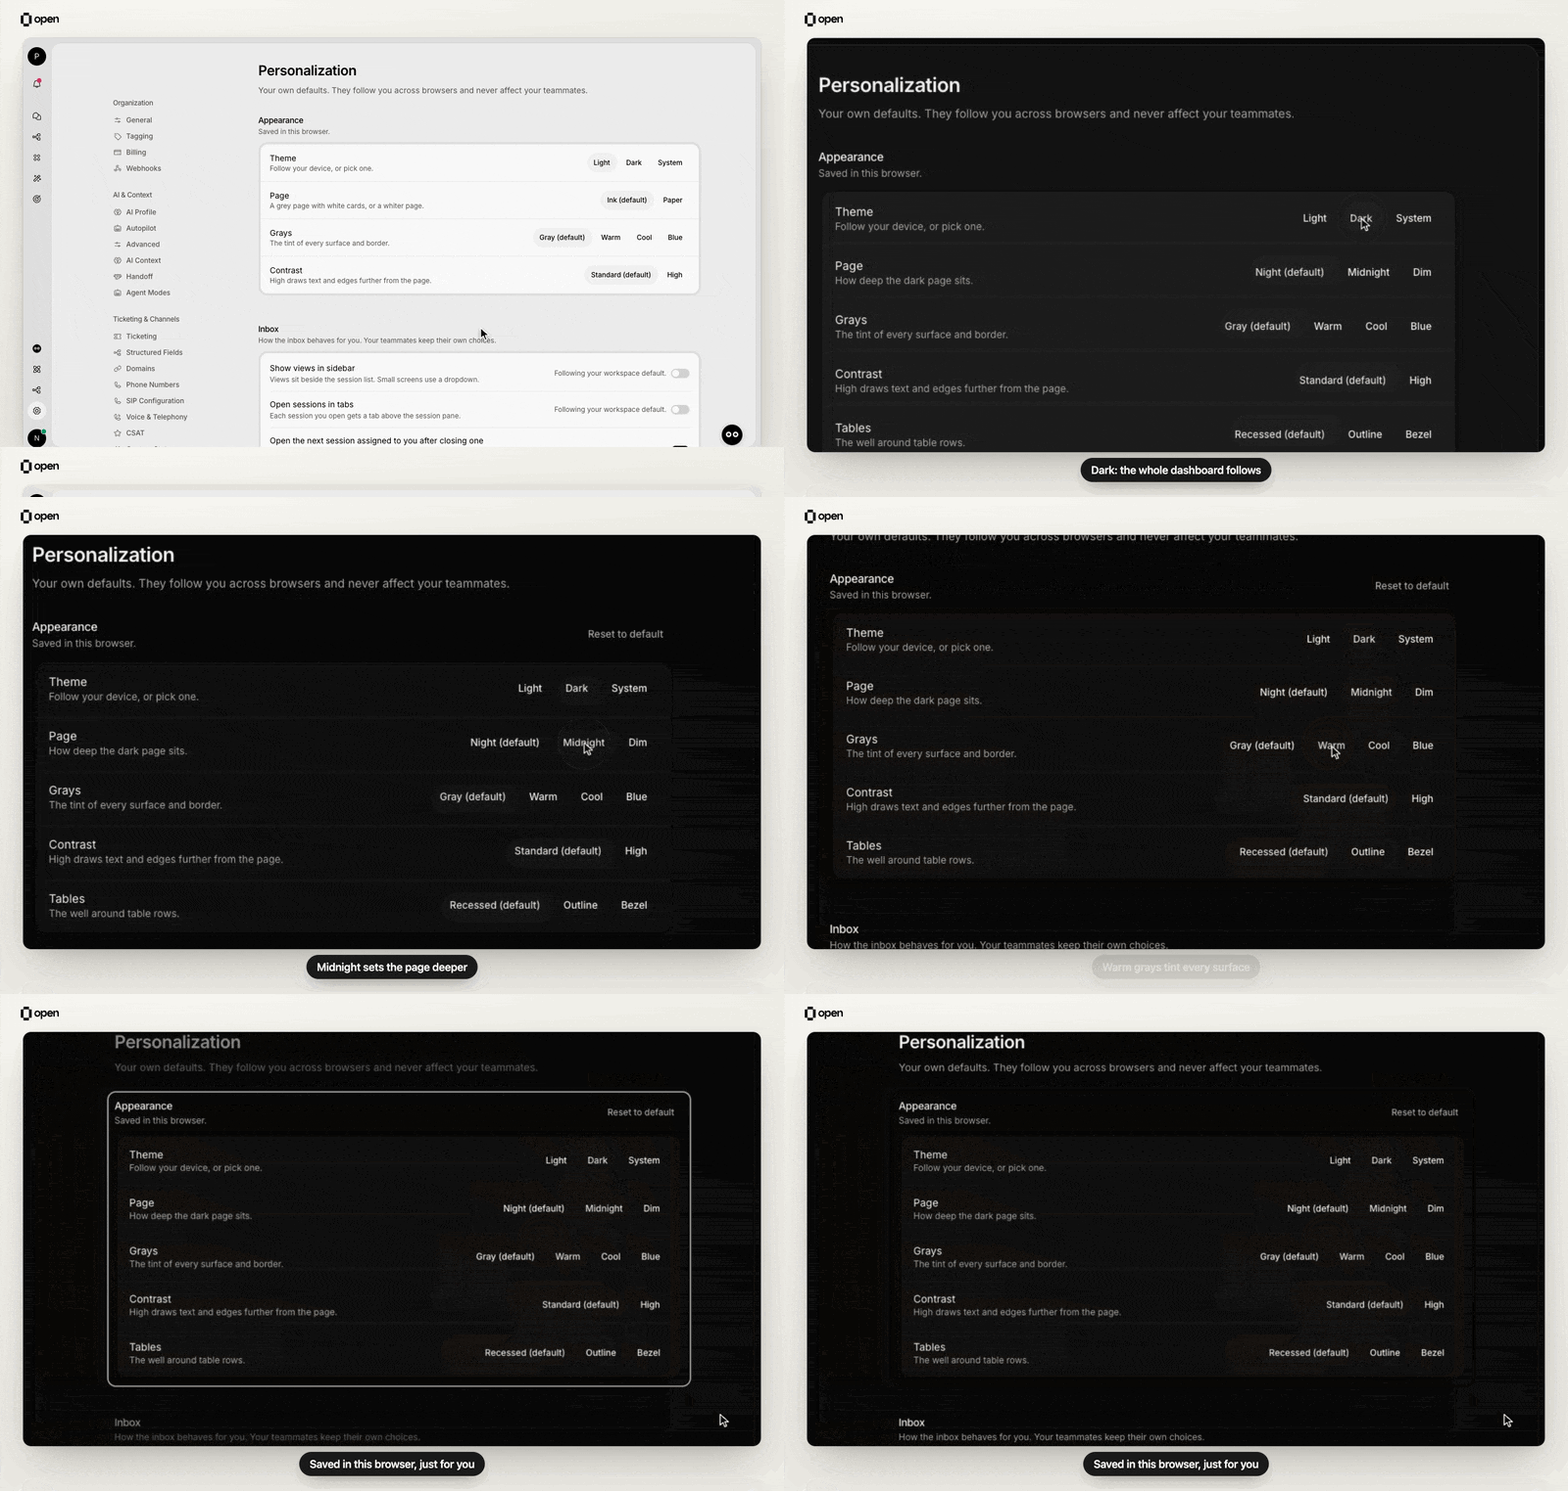
Switch the theme to Dark, then pick a deeper page and warm grays. Saved in this browser only.
Only the options for the mode you are in are shown. Reset to default appears once you change an option; it resets Page, Grays, Contrast and Tables, and leaves Theme as it is. You can also switch theme from the command menu with Change theme….
Set your inbox preferences
The Inbox section is saved to your account, so your choices follow you across browsers and workspaces.
Show views in sidebar and Open sessions in tabs follow the defaults an admin sets in workspace settings until you change them. While you follow the default, the row says Following your workspace default. Once you change it, select Use workspace default to follow it again.
Suggested macros works only while your workspace allows it. If an admin turned it off under Settings → Workspace → Replies, the switch is disabled with the note Turned off for this workspace by an admin. More on composer behavior and suggestions is in the inbox guide and macros.
Edit your profile
Your profile on Settings → My Profile applies to this workspace only. Your account name and photo stay as they are, and other workspaces are not affected.
Select Save changes to apply them, or Reset to discard. Until you set an alias, customers see your display name and photo.
Use a customer-facing alias
A Customer-facing alias replaces your name and photo for customers while your teammates keep seeing your profile. Use it when agents should not share their real names with customers.1
Name the alias
Under Customer-facing alias, enter an Alias name, such as “Alex from Support”, up to 100 characters.
2
Add a photo (optional)
Select Upload under Alias photo. Without one, customers see the alias’s initials, never your own photo.
3
Save
Select Save changes. To stop using it, select Remove alias, which clears the name and photo together.
- Your replies in the chat widget, including earlier messages in the session history.
- Emails, including agent names in email templates. While an alias is set, templates leave out your email address; your job title still appears if the template includes it.
- Replies sent to connected channels such as Slack, and replies and notes sent to a connected ticketing system.
- The agent-name variable in macros, such as
{{agent.full_name}}. - The assignee name that workflows receive for sessions assigned to you.
Troubleshooting
Related Documentation
Workspace settings
Defaults for every agent
Notification settings
Alerts and sounds
Members
Manage teammates and aliases
Inbox
Composer and views